Codan Envoy Radio – A Tech Turkey Review
 I’d been the user of a faithful, twenty year old HF radio for quite a number of years and I’d always been happy with that radio. I’d used it with an autotune antenna and also with a tapped whip. The convenience of the autotuner, particularly when changing frequencies was self evident but I was more attached to tapped whips that I already had. I didn’t mind having to get out of my car to change the taps. At the time, it was a better trade-off when looking for good performance from my radio. Use of my HF radio was on both the VKS-737 Radio Network and on Amateur Radio, having an advanced level licence.
Late in my radio’s life however, I installed an autotuner, enjoying the convenience of pushing that lovely little button labelled TUNE and not having to get out of the car to change taps.
Forward to 2017 and my previous vehicle was replaced with a two wheel drive Toyota Camry, now being a bitumen traveller. The thought of installing a radio with a somewhat sizeable remote control head didn’t impress me all that much so the old setup went on the market and I started working towards purchasing a Codan Envoy, this time without an autotune antenna as I wanted to save a bit of money by continuing to use my tapped whips. I’d also recently purchased an excellent single tapped whip antenna from Terlin Antennas in Perth that had both VKS-737 and my commonly used Amateur Bands on the one whip.
Having said that, the convenience of an autotune antenna is obvious and Codan makes two excellent autotune antennas, the well known and very proven 9350 autotune antenna and a newer 3040 autotune one.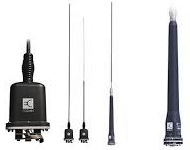
My decision to purchase an Envoy was influenced by the network’s decision to replace its older base station equipment with Codan Envoy setups. As a base operator with VKS-737, I had time to compare the performance of the new Envoys with the old base radios. I also played with the mobile Envoy and 9350 autotune antenna setup in our Chairman’s vehicle and noticed in particular that the receive sensitivity and general audio quality surpassed that of his previous HF setup. The performance generally of this setup was a good step above what I’d been used to. The decision was further influenced by the fact that the only thing I needed to install in the passenger compartment was a microphone and a speaker. I already had a VHF/UHF radio with a small remote head installed for other use so not having a second remote control head was appealing.
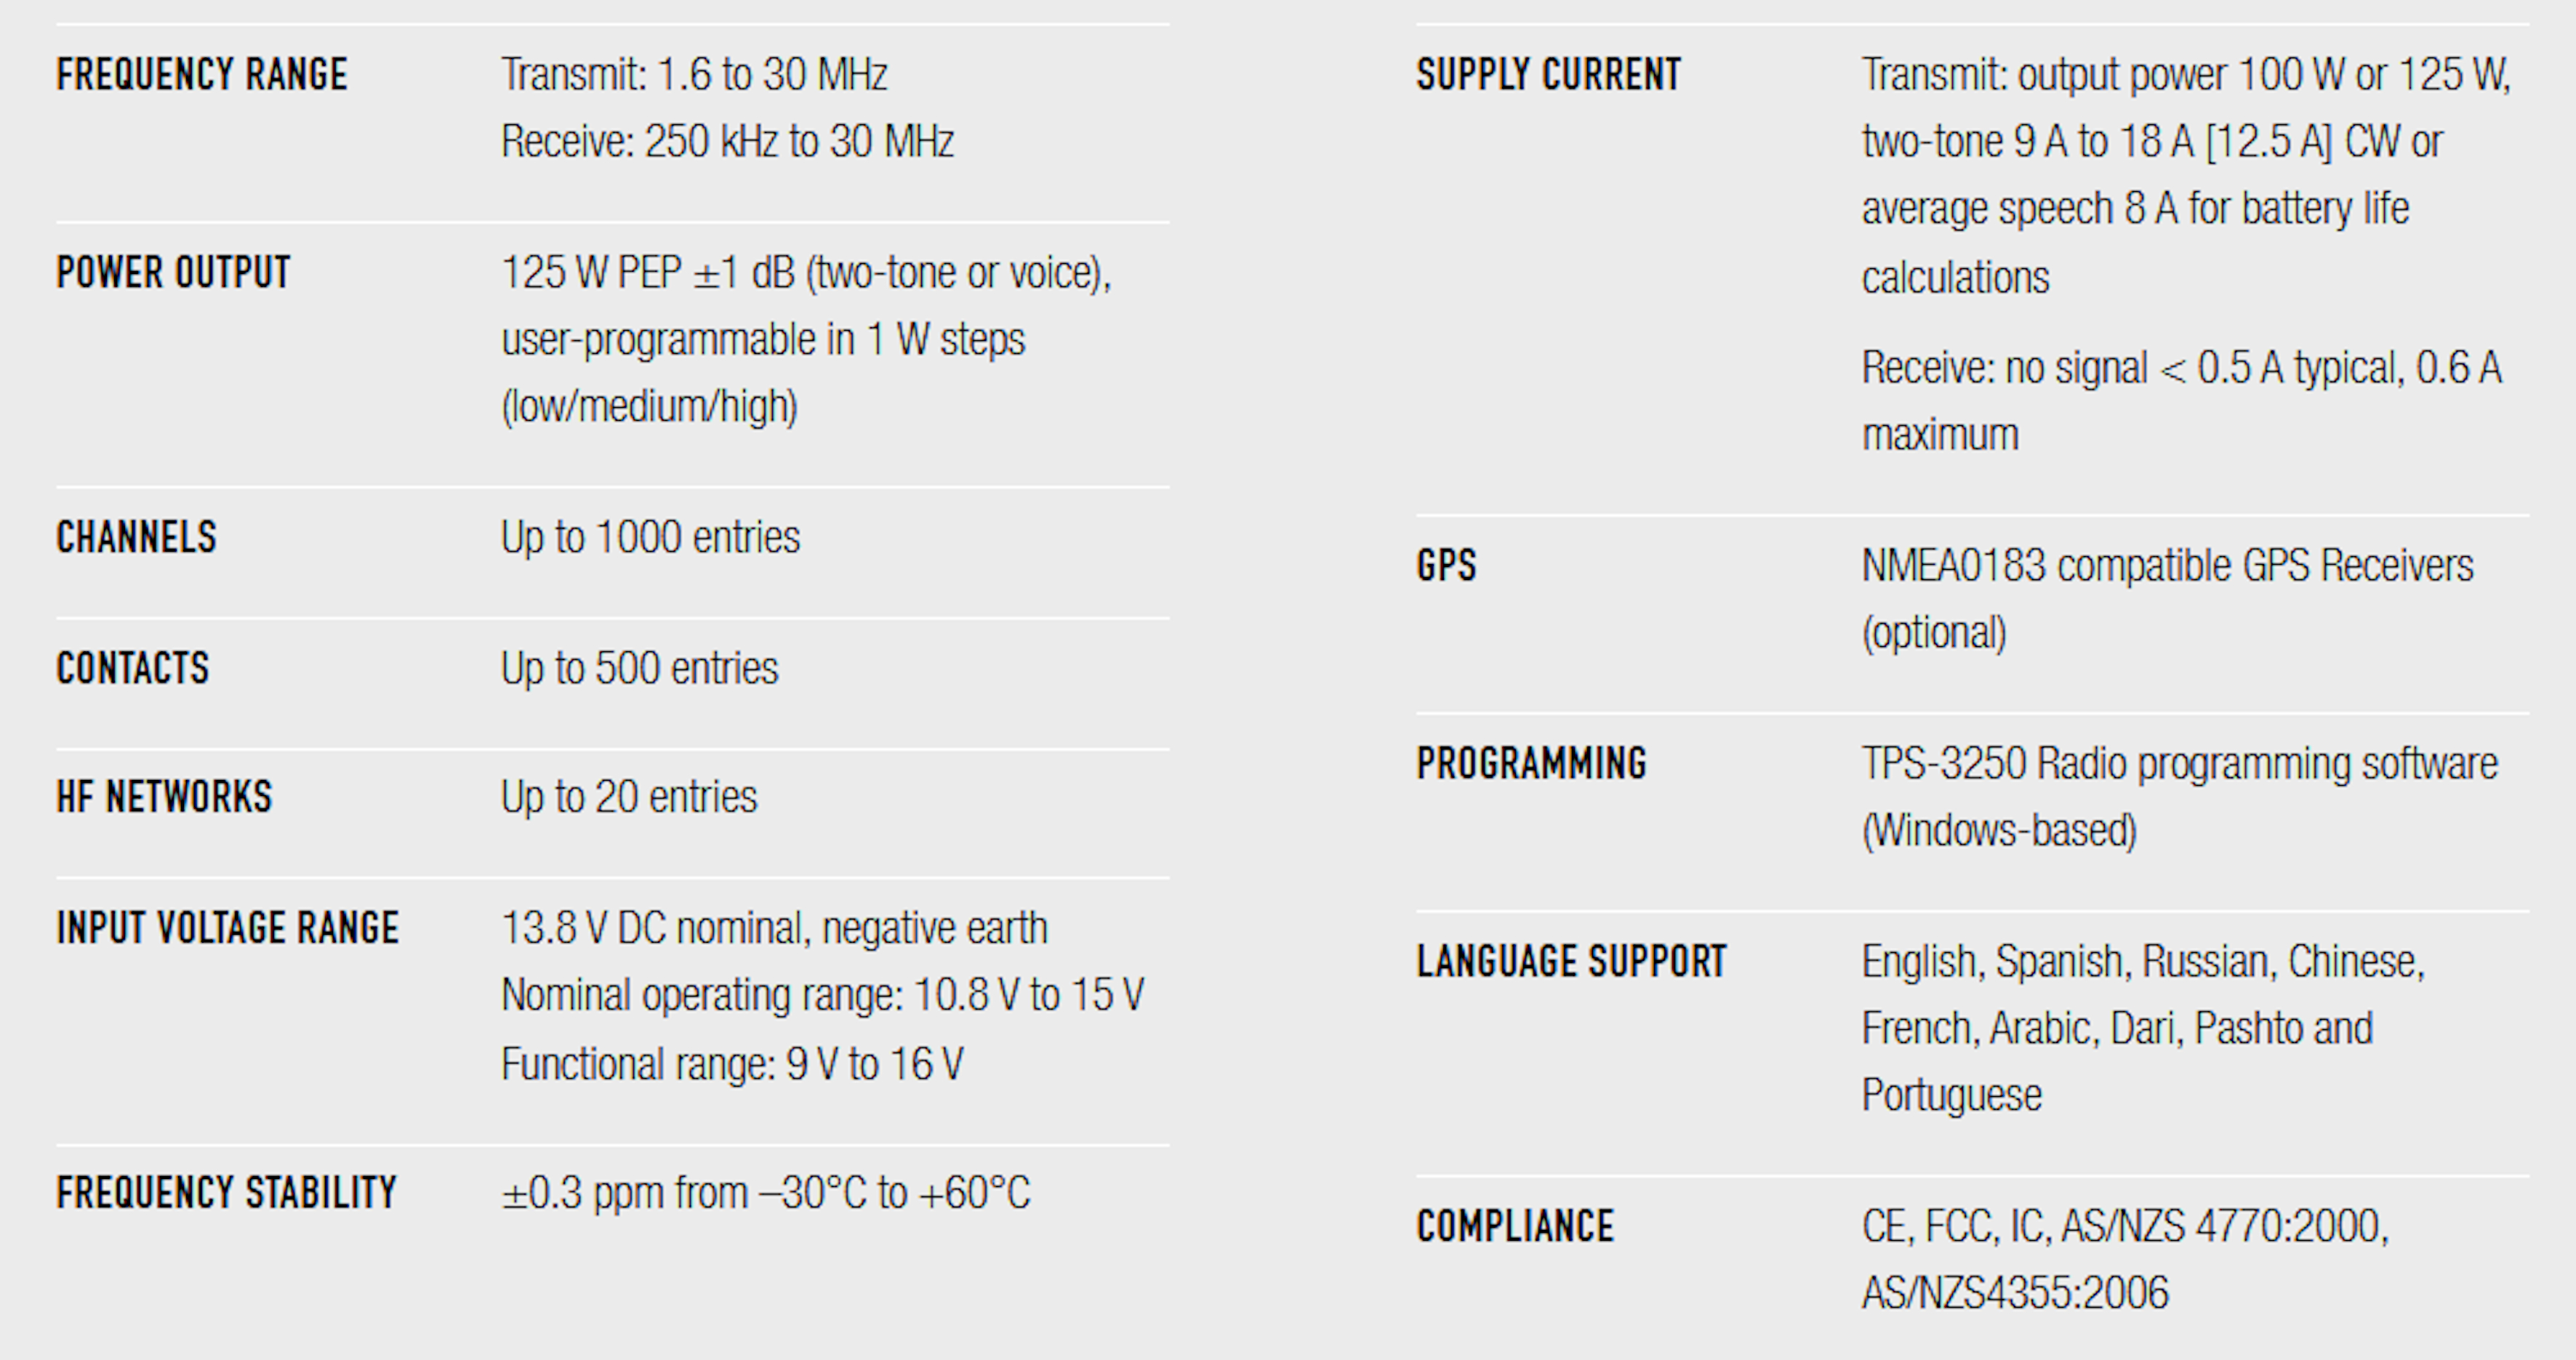
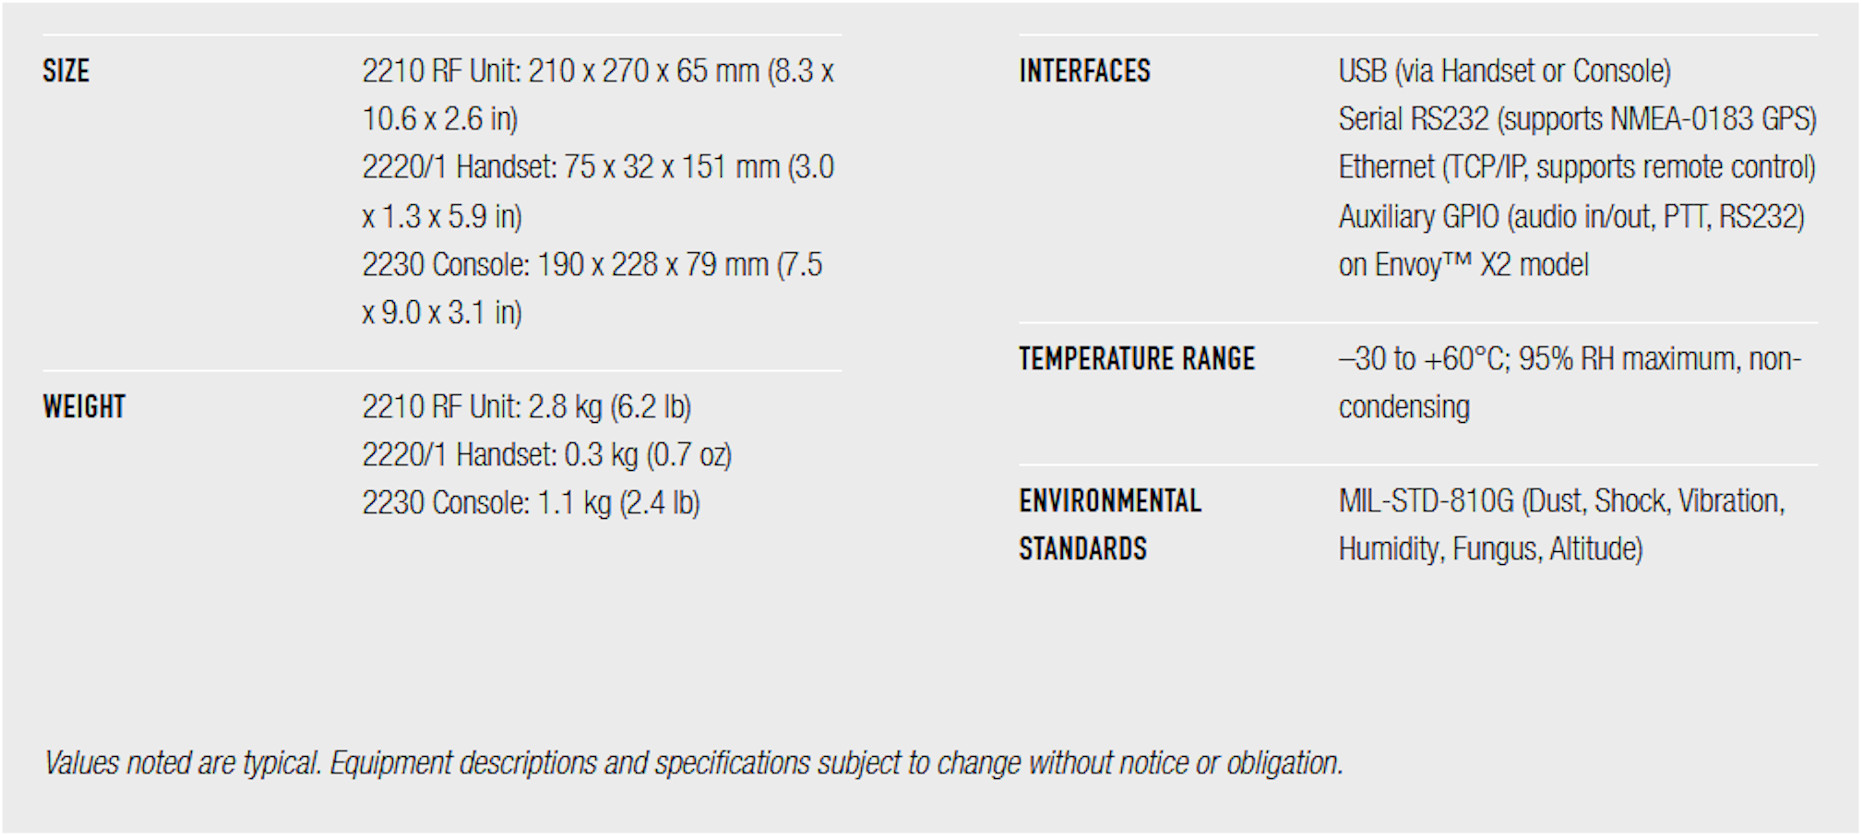
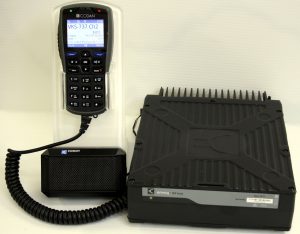
The Codan Envoy setup is a latest generation software defined radio, one where many of its functions are controlled by an onboard computer. This radio is quite a step up from Codan’s previous NGT and the older 9323. For those interested, there are specification panels at the bottom of this article. The set as supplied included the actual transceiver with a very solid mounting bracket, microphone complete with a 60mm diagonal colour screen and all controls, speaker and all leads. It came loaded with the latest VKS-737 profile. In addition, the Amateur Radio HF Bands were included. An appropriate Amateur Radio Licence must be verified for that inclusion.
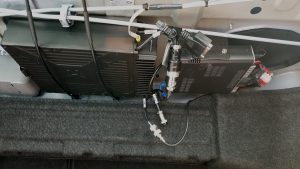
A point here about mounting the set in a four wheel drive, particularly when going outback – We’ve had the occasional traveller who’s managed to drown the inside of the vehicle in a water coarse and damaged, or actually kill the radio in the process. Mounting bits down low is not a good idea unless you are absolutely committed to keeping the inside of the vehicle 100 percent dry.
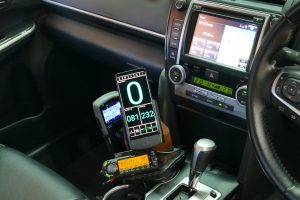
I already had a speaker for the dual band VHF/UHF radio, mounted on a piece of wood that was wedged under the left side of the console, so lengthening that gave me room to mount the Envoy’s speaker.
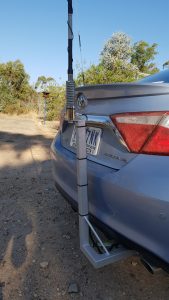
It was time to perform the standard smoke test by turning on my new HF setup.
On turn on, I noticed that it takes around 30 seconds before the radio is useable, typical of booting up an average computer. First up on the screen was the Codan specific stuff. After about 20 seconds the display changed to the VKS-737 colour logo and I had audio. It took another 10 seconds before it displayed the channel information; once that happened the radio was ready for action. It remembered whatever I was doing before I last turned it off.
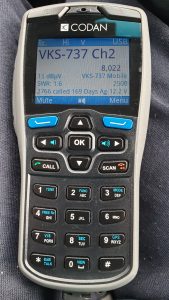
I’m not going to go into detail about the buttons below the screen. They’re easy to follow and most of the buttons on the number pad have secondary functions, depending on what you’re doing at the time.
In my previous vehicle I had to shield all around the engine management computer and as much of the cables running from it as I could reach to kill the interference. I had to bond (earth) the bonnet, back and the exhaust system. Lastly I bonded various body parts to near neighbours.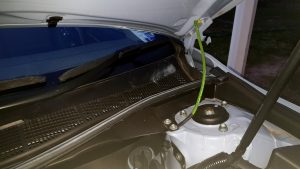
I did repeat this bonding process in the new car, more for insurance than anything else but it certainly resulted in a setup that was completely free of any local interference from my car.
After installation and going mobile from Adelaide to the Grampians, also places north, I checked in on as many base skeds as I could successfully work. For those of you who are familiar with the eleven year sunspot cycle, we are just now coming out of the doldrums (late 2019), the lowest point of what was been described by some as the worst sunspot cycle in 100 years. These cycles affect the Ionosphere, an ionised band of particles high up at the edge of our atmosphere. These particles refract, or bend HF radio waves back towards the earth and that’s what gives us long distances without the need for things like repeater stations.
Considering that we’re in a low, sunspot wise I found that I had no trouble making contact with stations a long way away. I successfully logged in to Meekatharra Base a couple of times from Western Victoria during their morning sked. In fact, with current conditions (as at end of August 2019) the clue was to find bases much further away than normal, also to try lower frequencies. I’m amazed that our 5 Meg frequency gets so little use during sked times. I can talk vast distances on that, particularly late in the day with good audio quality. I even made successful contact at night with Darrin, a regular Base Operator on the Wallaby, travelling the Canning Stock Route. That was on our lowest frequency (a bit below 4MHz). Darrin was quite weak back to me but my Envoy successfully dug him out of the noise. I was mobile heading back to Adelaide from Kangaroo Island.
I won’t go into details about selcalling but I found it to be amazingly easy. Using to Envoy with HF-Tel was also a breeze.
On transmit, I guess that no-one would have known that I was using an Envoy unless I told them, however the radio applies a degree of compression to my voice that results in better transmitted audio. Other modern radios do that as well. The difference in this case is with the received audio. I’ve had experience using some other radios that have digital noise reduction and I found that I preferred to have the noise reduction turned off. In the case of my Envoy, leaving it on (it’s called EasyTalk) was definitely better than running the receiver with digital noise reduction off. When listening to other mobiles and our base stations, the radio recovered voices remarkably better with EasyTalk on. I found that it was really cheese and chalk. After initial testing, I now leave it on permanently.
I mentioned earlier that I use my Envoy on Amateur Radio HF Bands as well as on VKS-737. Getting used to selecting various bands and tuning (or VFOing up and down) initially took some practise as some of the buttons performed different functions. Once I got used to it though, I found it quite easy to go up and down, frequency wise in various steps from kilohertz to single hertz. With my previous radio, I had Amateur Radio frequencies programmed in fixed 5kHz steps. Having the ability to tune up and down in small steps was an advantage.
The Menu has a lot of functions and it takes some practise to become familiar with what’s there. I’ve set the transmit power levels to 10, 50 and 100 watts. Yes, the specifications state that the Envoy is capable of 125 watts but the Envoys here in Aus Land peak out at 100 watts. There is imperceivable difference between 100 watts and 125 watts. I also set the display brightness to go to Night Mode at a convenient time as the sun went down. Night mode is quite dim compared to day mode, brightness wise. My reasoning here was that if I used the microphone at night while mobile, I could have been picked up by certain persons who might have suspected me of using my mobile phone. I might note here that I pull up in a safe place at night if I want to talk on the radio. That’s my story and I’m sticking to it.
Where necessary, updating the radio is a breeze. The file is copied on to a blank USB stick and, via a small adaptor lead it’s plugged into the base of the microphone. One follows the prompts on the screen and it’s done in a flash.
The VKS-737 Radio Network is a community of like-minded travellers who move around our great Country, many of them for months at a time. That’s why I suggest that leaving your radio turned on during the day could help with safety and who knows, you might even meet new friends through contacts you make on air. Base Operators on voice skeds love people who can assist with relays from callers when conditions become difficult. When travelling and outside voice sked hours, I announce my callsign, where I am and where I’m going to and that I’m listening on the channel. A number of times I’ve had others come back to me. Try it and see.
Categories
- 3G mobile phone (2)
- Codan Envoy (6)
- Codan Raffle (5)
- Community Service (23)
- Coronavirus (2)
- COVID-19 (3)
- Environmental (3)
- Fund Raising (2)
- HF-Tel (1)
- High Frequency (40)
- Minelab (5)
- Needing Help (11)
- News (33)
- permits (1)
- Radio (39)
- Restrictions (3)
- RFDS (7)
- Road Closures (3)
- satellite (2)
- satphones (5)
- Selcall (2)
- Sports (1)
- Travel (14)
- VKS-737 Radio Network (43)
- VKS-737 Subscribers (32)
- what3words (2)


